Showing posts with label Glitter. Show all posts

Friday, 26 August 2016

CAS Colours & Sketches #188

Hi All

Here is my card for my last challenge as Guest Designer at CAS Colours & Sketches.


I worked on a print from our recent Shaving Foam technique class with the Falling Flowers set.
Blackened the background with Stampin' Marker before heat embossing in gold. Layered on kraft card using the Layering Ovals.


For the sketch I added glitter with double sided tape and the sentiment is from the Wetlands set.

Check out the rest of the design team's cards and join in CC&C#188

Thanks for stopping by
Jay


Wednesday, 13 July 2016

Stampin' with Picture Perfect for Challenges

Hi All


I created a floral card with the sentiment customised from the Crazy About You set. I have CASEd the layout, gold details and splatter effects from Steffi Helmschrott's card with the colours from CC&S


Stampin' the flower from Picture Perfect set on Very Vanilla card, I used 2nd generation technique to achieve 2 shades of the Elegant Eggplant, Soft Suede for the shadows and gold glitter to the highlights.


The flourish is from Hopeful Thoughts set, stamped with Cucumber Crush and the splatter effect is from Awesomely Artistic set stamped with Soft Suede. I added extra glitter dots on the card base and Gold Wink of Stella.


I felt that the background was too much so I used Whisper White Craft Stampin' Pad to help tone it back down which worked great.

Hope you like the card and thank you for stopping by

Jay

Friday, 2 October 2015

Sleigh Ride Edgelits

Hi All

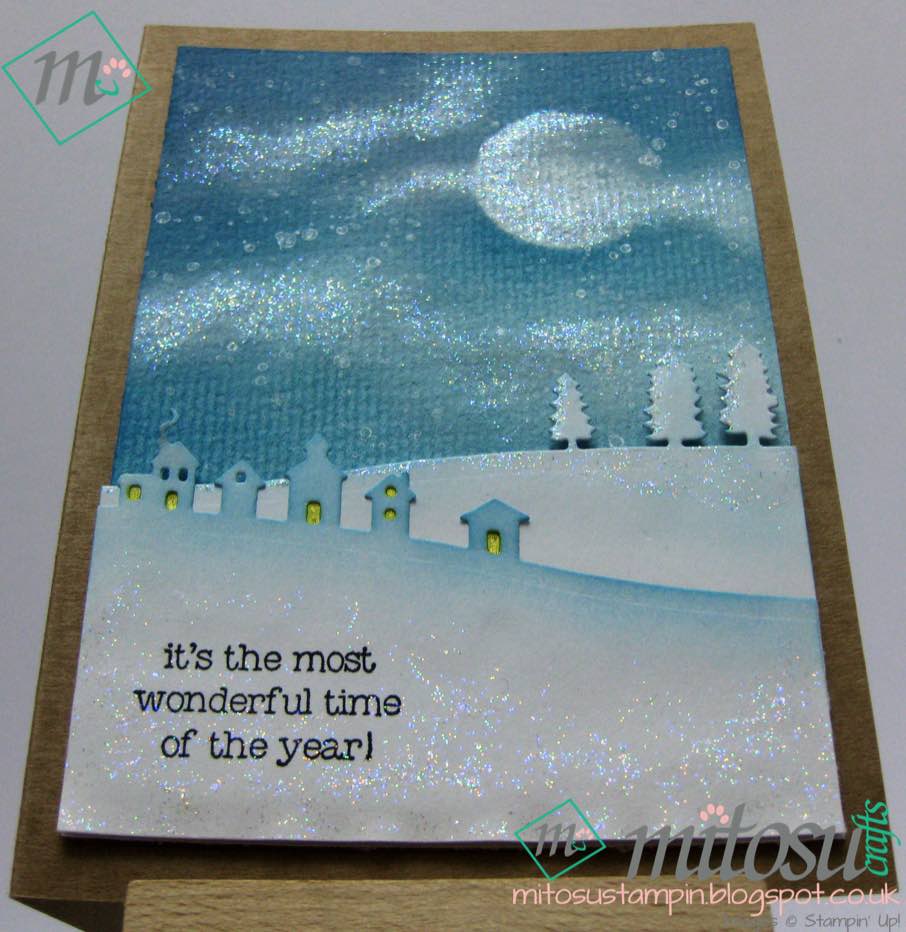
Hope you're having a great week so far. We had our class on Tuesday and used the Sleigh Ride Edgelits on our projects.


The sky was created by randomly applying 3 shades of blue inks with Stamping Sponges then using the Craft pigment ink with the Sponge Daubers for the moon and the clouds. Add a bit more of the blue inks to darken certain areas before using Gorgeous Grunge for the falling snow.
Use 7.5cm x 9.5cm card, align the top of trees edgelits to the top of the card and run through the Big Shot. For the houses edgelits, use 6cm x 9.5cm card.
Ink the edges, stamp the sentiment before adhering with stampin' pads. Apply glitter and use yellow glitter pen for the windows.


Quick and simple card, just add sentiment (from Christmas Cuties) and Gorgeous Grunge for the background.

Barry made another card for our class which we currently can't locate but will hopefully post in the future.

We also made a few more cards using the edgelits for our inspiration table


Colour combo was inspired by a game. The sentiment is from Wondrous Wreath and Endless Birthday Wishes. TIP: use cotton buds for finer details on the clouds if the daubers are too big.


This card can be flatten to easily put in an envelope. Barry created the scene by adding 1cm depth on both edgelits. 
Dimensions when opened 12.8cm x 10.5cm x 2cm
Black card 16.8cm x 10.5cm. Score at 2cm and 14.8cm
Houses 14.8cm x 8cm. Score at 1cm and 13.8cm 
Sleigh 14.8cm x 8cm. Score at 1cm and 13.8cm


Another card by Barry with 2cm depth using different inks. I couldn't quite get the lighting right for the glitter to show on this card :(

I also made 2 more after our class:


I made this card using the piece I started during class to demo how to do the clouds. I used the off cut of the edgelits as a stencil to add the silhouette. We were also talking about the super moon during class which I tried to recreate here.


I just love these colours and creating the clouds so I did another one with the off cuts as stencil.

Hope these inspires you to create something this weekend. Details of our demos and class this month can be found on our site - CLICK HERE

Thanks for looking and have a great weekend.

Jay

Thursday, 17 September 2015

Thank You Cards with Awesomely Artistic and No Bones About It

Hi All

Hope you're having a great week so far. The weather has been horrible where we are and it's getting colder, hope you're all dry and warm where you are.

Anyways, I just wanted to share a couple of Thank You cards I made recently using the stamp sets I received for my birthday last month.


I stamped the image on Tangelo Twist card then I used the Blender Pens around the image outline and adding glitter in the middle of the flowers. I also used Gorgeous Grunge stamps to add more interest.


I stamped the same image on the card base then used white Grosgrain ribbon, dyed with Tangelo Twist, folded and adhered on the top left before sticking the topper with foam pads. The sentiment is from Another Thank You set stamped using Archival Gray.


For this card I cut Delightful Dijon card into 4 sections and used opaque embossing powder for the dinosaur. The Gorgeous Grunge stamps were used to add more interest with 1st and 2nd generation stamping before sponging around the image and edges.


The sentiments were stamped with Archival Gray and adhered the 2nd and 4th panels with foam pads.

If you are interested in any of the products used, check them out below. We also run stampin' craft classes in Basingstoke so contact us if you any questions.

Thanks for looking and until next time, happy stampin'

Jay

Thursday, 27 August 2015

Gelli Plate Background

Hi All

Just wanted to share a 6x6 card using the Flower Patch stamp set with the Gelli Plate to create the  background inspired by Barbara Gray.


Ink up the Gelli Plate, crumple scrap paper and dab.
Tear photocopy paper in 3 parts and place the middle across the Gelli Plate.
Place cardstock on top and press firmly to transfer the ink.
Lift off cardstock and place the 2 other torn photocopy papers to protect the background.
Stamp randomly with Flower Patch stamp set including the sentiment.


I also added glitter around the border of the card base using double sided sticky tape before adhering the topper.


Thanks for looking and happy stampin'

Barry

Popular Posts