Showing posts with label Flower Patch. Show all posts

Tuesday, 13 September 2016

Stampin' with Flower Patch and Wherever You Go

Hi All

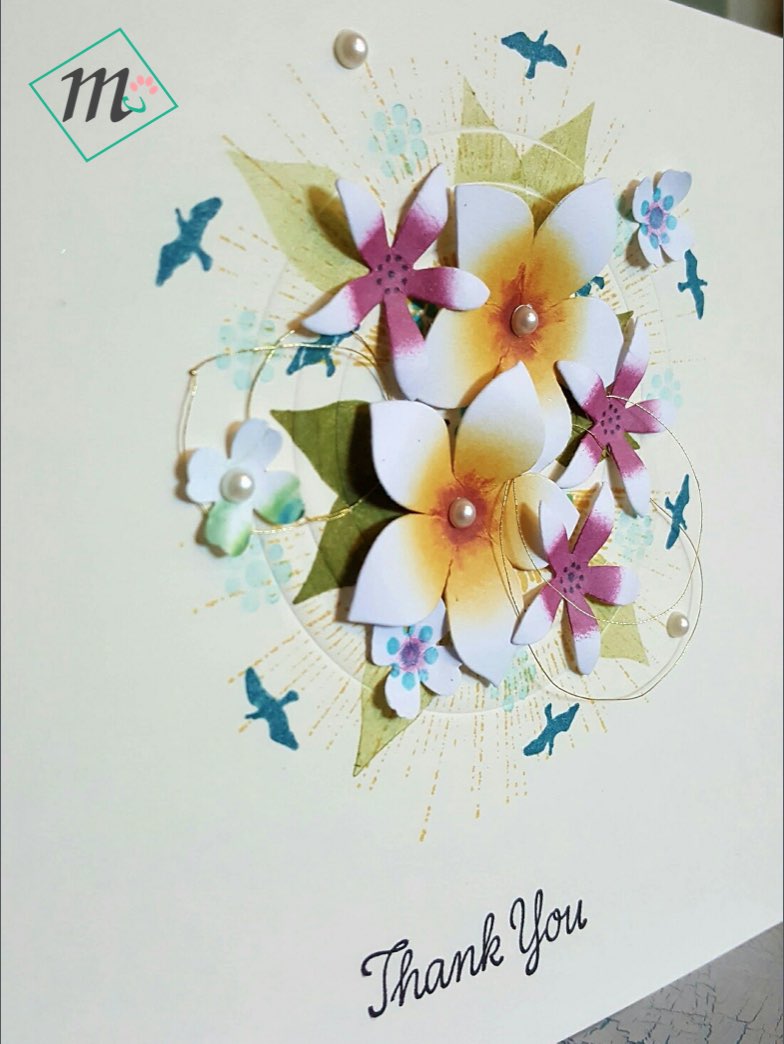
I am sharing with you today a couple of cards using the Flower Patch and Wherever You Go sets from Stampin' Up! 

From my last post, I was inspired by my sister's wedding bouquet and loved the effect so much I created some more using the Flower Fair dies.


I used the Layering Circles die to emboss the base card before stamping and decorating with the flowers. Sentiments used are from Wetlands and Thankful Thoughts.


I used daubers and cotton buds to colour the inside of the flowers then finishing off with the pearls and gold metallic thread.


I was very pleased with these cards and surprised how the vanilla base card made the flowers pop even more.

Thanks for stopping by and I hope you like the cards. Contact us if you have any questions regarding the products used which are available on our Online Store.

Jay
Mitosu Crafts
Your Independent Stampin' Up! Demonstrators in Basingstoke

Wednesday, 7 September 2016

CAS Colours & Sketches 189

UPDATE: Alas I was too late :( hopefully next week I will be on time submitting my link.

Hi All

A really quick post to enter my card for Challenge 189 at CAS Colours & Sketches.


Using the above colours with the Flower Fair framelits, I tried re-creating flowers from my sister's wedding bouquet. I really like how they've turned out and will try and do more soon.


Thank you for stopping by
Jay

Saturday, 5 September 2015

Flower Patch - Blooming Birthday

Hi All

Hope you've had a lovely week and a better weekend to come. I want to share with you a card using the Flower Patch stamp, the matching Flower Fair Framelits Dies and the Deco Label Framelits. 


The idea behind this was using the dies to cut out the card base to help with composition and masking then putting it all back like a puzzle!


Die cut the smallest and 2nd smallest Deco Label framelit at the middle.
Ink around the edges of the label.
Die cut the leaves at the bottom left and the flowers at the top right.
Stamp the matching images on the die cut pieces.
Stamp on the Very Vanilla card, use 2nd Generation stamping technique to add more depth.
Mat onto Navy card and adhere the die cut pieces back.
Stamp sentiment and heat emboss with opaque embossing powder.
Adhere to card stock and add 3 Pearl Basic Jewels under the sentiment and on the flower.

The magnetic platform was very handy for this project in keeping the dies exactly where I needed them!


I would like to enter this card to the following challenges:
Crafting From The Heart - 75 Anything Goes
Craft Your Passion Challenges - 277 Anything Goes
Crafty Cardmakers And More - 146 No Patterened Papers
Creative Moments - 76 Anything Goes / Use A Sentiment
Crafty Catz - 291 Anything Goes
Creative Fingers Challenge Blog - 91 Anything Goes

Thanks for looking

Jay

Sunday, 24 May 2015

Actual Swap And Name Badges

Hi All

This week has gone very quick as I have been busy with work and other projects so this is a little late but as promised here's my actual card which I swapped with other demonstrators at Telford last Saturday.


The only differences are the background stamp, sentiment and colours. I used the Something Lacy background stamp with the sentiment and border for the banner from the Butterfly Basics set.


I also altered the colours for the flowers so I ended up with 10 each and Barry made 20 of his card  (from the previous post) in different colours.


The construction and measurements are the same as the original which is A6 and folds flat to fit nicely in an envelope.

We also made our own name badge below.


I created a mask with the Little Letters Thinlits then used the rock 'n' rolling technique with the leaves stamp from the Sheltering Tree set. I added shadows around my name to make it stand out more before daubing around the edges.


Barry used the Gorgeous Grunge set on A6 card then die cut his name with the same thinlits. He then used dimensionals before matting onto Lost Lagoon card.

Unfortunately, I haven't taken pics of the swaps we received from other the demonstrators so I will have to post those another time.

Thanks for stopping by

Jay

Friday, 15 May 2015

First Version Of Swap For The Stampin' Up! Regional Event 2015 (Telford)

Hi All

We are off to the 2015 Stampin' Up! Regional Event which is held at Telford. It's our first one and we are so excited to be able to meet other demonstrators and play with the new products which will be available in June in conjunction with the new catalogue launch.

All demos were asked to create something to swap with others and here's the first version of mine using the Flower Patch stamp set and the matching Flower Fair framelits. 

Everyone loves the pop up boxes so I wanted a project in between a card and a box and came up with this.


It's constructed so it can fold flat and fit in a C6 envelope but it can also stand up on its own when opened.

I am entering this to the following challenges:
Crafting From The Heart - 59 Anything Goes
Craft Your Passion Challenges - 261 Anything Goes
Crafty Cardmakers And More - 138 Make Your Own Background


Product informations are below and you can buy them from us. I will share my final version net week.

Thanks for looking and have a great weekend.

Jay


Wednesday, 6 May 2015

Happy Blooming Birthday

Hi All

Time for another post, Thanks for stopping by & i hope you like and get some inspiration from what you see.

Todays card is made using the Flower Patch stamp set. Ive made my own DSP for the background, which I'm really into at the moment. I've stamped several of the stamps from this set in several colours randomly and then die cut the circle in the top centre. Ive also die cut a smaller circle for the sentiment. 

TOP TIP If you keep the die in place and then ink over the die you can achieve the crisp white edge.

 The centre parts of the flowers have been stamped in versa mark ink and then covered with red embossing powder. I love this technique.

To finish I've layered the whole piece onto blackberry Bliss card stock and raised the sentiment with dimensional pads.

I was quite happy with how this turned out.

Please feel free to leave a comment 

Thank you

Barry


Built for Free Using: My Stampin Blog

You are Amazingly Amazing

Hi Everyone

Thanks for stopping by our blog today. Todays creation is a card I've made using the Flower Patch & Painted petals stamp sets from Stampin Up!

I'm into trying to make my own backgrounds and have only used one stamp to create this one. The sentiment is from the Painted Petals stamp set along with the strips.

The flower patch set is one of my favs at the moment especially when used with the coordinating dies. Its makes it so much easier to cut out rather than using scissors.

Anyway I hope you like it. You can find a list of products used below.

Thanks

Barry


Built for Free Using: My Stampin Blog

Tuesday, 21 April 2015

Mitosu Crafts Stampin' Flower Patch

Hi All

Here is a simple card I made using the Stamping Up! Flower Patch stamp set. I have incorporated the stamp set with the Lyra Gemini die from Sue Wilson.
The flowers and leaves have been arranged onto the red card and layered using the dimensional pads from Stamping Up! to give it some depth and interest.
For extra interest I have stamped the sentiment using versamark and embossed with a red embossing powder.

Thank you for looking

Barry
Mitosu Crafts Stamping Up! Demonstrator


Built for Free Using: My Stampin Blog

Monday, 13 April 2015

Mitosu Stampin' Painted Petals and Flower Patch Stamp Sets

Hi all

Thank you for taking the time to stop by our new Mitosu Stampin Up! blog. We have both been busy playing with our new stamp sets and working on getting this blog up and running. So now it's time to share a couple of our creations.


The Painted Petals stamp set is a 2 stamp technique where I stamped the leaves first followed by the leaves once I had them in place. I haven't used it on the project but if anyone has problems lining the stamps up i would recommend you use the Stampin Up! Stamp-A-Ma-Jig, which is a great tool for perfect stamp placement especially for the clear mounted stamps.


For the above card I have used the Flower Patch stamp set and Flower Fair Framelits Dies which are available in a bundle or separately. I've only cut a portion of the die to create the flower hanging off the edge and then stamped the matching stamp in its place. I've also die cut some extra flowers on copy paper to use as a mask (the masking technique). This allows me to stamp the leaves without touching the flowers. It also makes it look as if they are behind the flowers. The sentiment has been stamped and attached using dimensional foam pads.

I hope you like our creations, please feel free to leave a comment below.

Until next time

Barry
Mitosu Stampin' Up! Demonstrator 

Built for Free Using: My Stampin Blog

Popular Posts